Setup
Requirements
- Tasker installed on your Android device
- A running Home Assistant instance (local or remote)
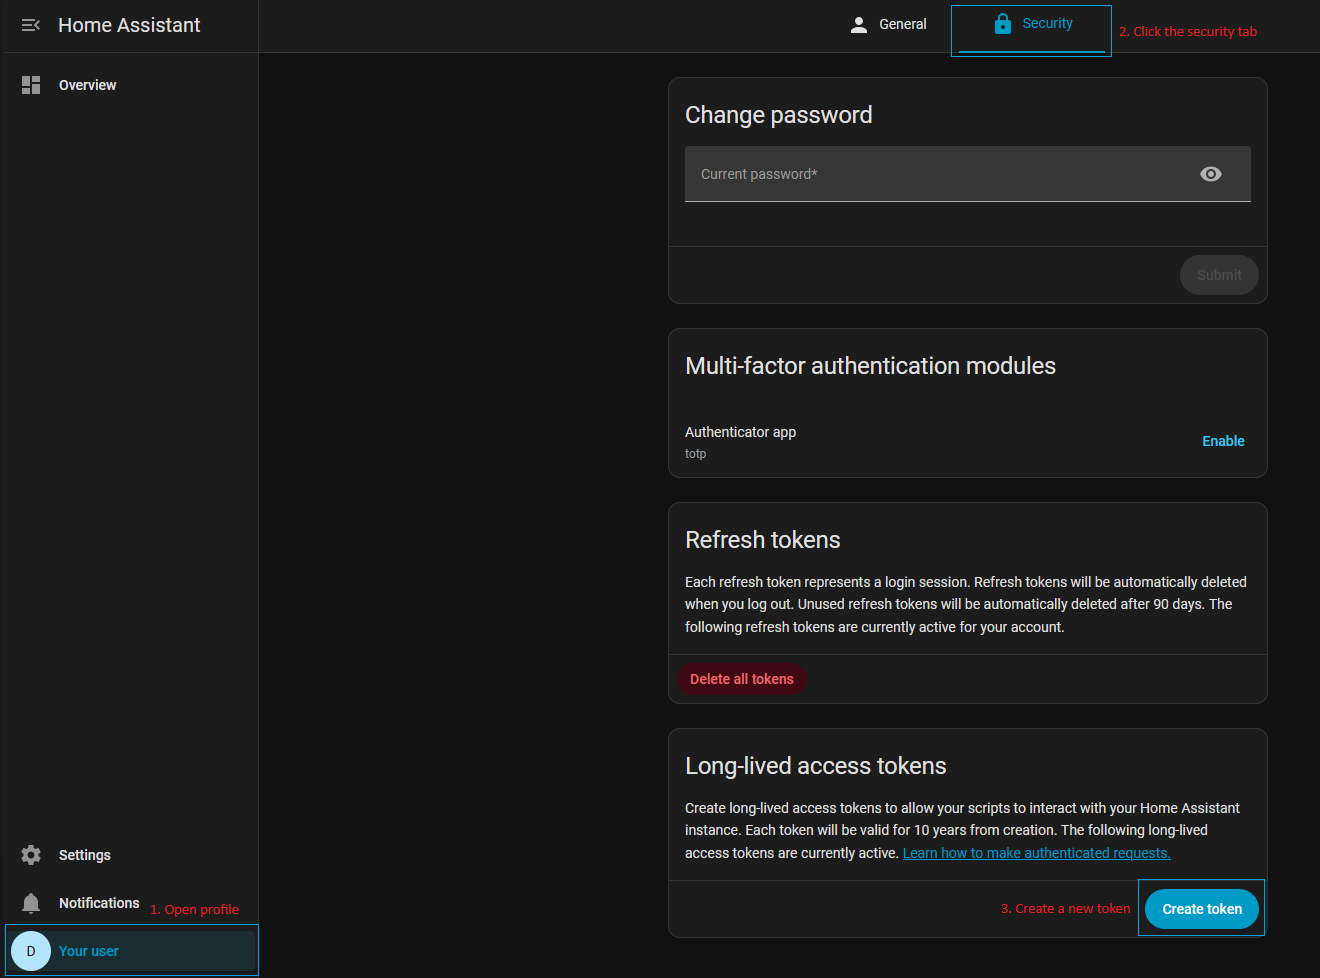
Step 1 — Create a Long-Lived Access Token
- In Home Assistant, go to your Profile (bottom-left avatar).
- Scroll down to Long-Lived Access Tokens and click Create Token.
- Give it a name (e.g.
TaskerHA) and copy the token — you will not be able to see it again.
Step 2 — Install the App
| Source | Notes |
|---|---|
| GitHub Releases | Latest version, sideload APK |
| F-Droid | Open-source store, may lag behind |
You cannot install both versions side by side — uninstall one before switching sources. Your tasks and profiles will survive, but you will need to re-enter your server settings.
Step 3 — Add Your First Instance
- Open the TaskerHA app (not from inside Tasker).
- Tap Add instance and give it a name (e.g.
Home). - Enter your Home Assistant URL (e.g.
http://192.168.1.xxx:8123orhttps://ha.yourdomain.com). - Paste the access token you created.
- Tap Test, then Save.

That's it — you're ready to add actions and profiles in Tasker. For more advanced instance configuration (multiple servers, automatic local/remote URL switching) see the Instances page.
Step 4 — Add Actions or Profiles in Tasker
All functionality is available under Plugin → TaskerHA in Tasker.
| Feature | Type | Where to find |
|---|---|---|
| Call a HA service | Action | Task → Add → Plugin → TaskerHA → HA Call Service |
| Read an entity state | Action | Task → Add → Plugin → TaskerHA → HA Get State |
| Send message to HA | Action | Task → Add → Plugin → TaskerHA → HA Send Message Back |
| React to entity changes | Profile | New Profile → Plugin → TaskerHA → HA On Trigger State |
| Receive messages from HA | Profile | New Profile → Plugin → TaskerHA → HA Direct Message |
See the individual pages for full configuration details and variable references.